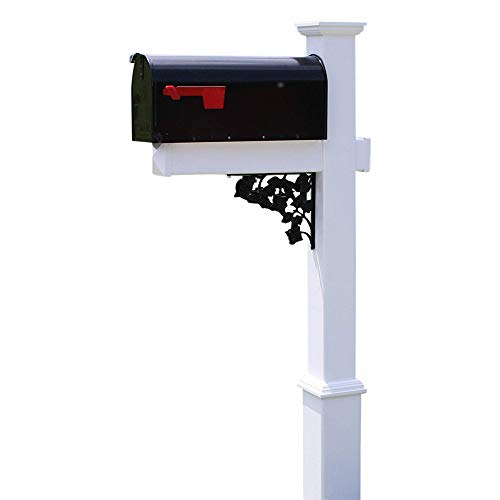
Mail Boss 7121, Black In-Ground Mounting Post, 43 x 4 x 4 inches, for Use with Mailbox
Score By Feature
OveReview Final Score
Product Description
Questions & Answers
No 4x4 needs to be used to cement the unit into the ground. While only 10 inches of it went into the ground, it seems to be very durable considering it did not use a 4x4. It took me about 14 minutes to make the hole. Place a post in a hole filled with cement that is about an inch wide, and then fill the hole with cement so it goes inside the post as well. This time, I also installed bolts out of the holes, which would be used to secure the four by four to the post. Five inches were the length of the bolts I installed. They were sticking into the cement, and I felt like this gave it some It is no problem for me to do it both ways. You could put a 4x4 a few feet down and secure the post to it before adding cement to the hole if you wanted something even stronger. You can do what you want, but I did not have a problem not using the 4x4 and they have been fine since May. I hope you find this helpful.
Other mail box brands are compatible with this product
As the sleeve has been designed to fit around a 4x4, it is a little larger than 3 inches on the inside. Five times three. The width of an inch is five
Since we received ours in November 2017, we had very cold temperatures, ice and snow a few times but the system did not malfunction. Even so, it is still a great piece. The extra security that prevents mail tampering is awesome.
Selected User Reviews For Mail Boss 7121, Black In-Ground Mounting Post, 43 x 4 x 4 inches, for Use with Mailbox
5" by 3" The wood post will need to be reasonably straight (although the height will need to be 5”). Weighing 14 pounds, the steel post is 14 inches high. A squared-off steel plate is securely welded over the top end of the post, and the walls of the post are roughly 1/16 inch thick and quite solid. The bottom end of the post is open, and the top is squared-off and 3/8 inch wide. The 11 mm heads are very strange, when the 12 inch ones would have been better. 5" by 3" A No. 6 wood post and a 5" wood post. Unless you purchase separate 10 (or 14 inch) by 2" lag screws, you will need to use the parts contained in this set. When a galvanized steel post is set in the ground, I recommend using only zinc-coated steel lag screws (19 cents each at any Home Depot) to avoid corrosion caused by dissimilar metals where the screw head contacts the galvanized steel. There was no light coming from either the 7121 post or the 7106 mail box. securing the mounting plate to the post, it is necessary to mount the mail box to it. Then one attaches the two screws previously mentioned firmly on the bottom of the mail box. Bolts and screws cannot be accessed by a thief without the lockable door being opened. The U. S. In order to comply with postal regulations, the mail entry slot of the mailboxes must be located between 41 and 45 inches above the surface of the road. As measured from the bottom edge of the mail box to the top plate of the steel post, the mail box's mail entry slot is approximately 12 inches above the top plate of the post when it As the post is 43” long, it will only be possible for you to sink about 10 to 14 inches of the steel post into the ground as long as the roadway is level with the ground where you will mount the mailbox. On a residential street with a curb and the mail box is mounted in ground a few inches above the street surface, you might be able to sink the steel post a few additional inches. Even this is probably not deep enough for the box to sit securely, even if you concrete the post all the way up to the top. If you want to use a pressure washer, it is highly likely that one will be needed The hollow steel post can also be inserted with a treated wood post inside to allow the post to be sunk significantly deeper - especially without For planting in cold climates, it is likely that you will need to dig a hole at least three or four feet deep. It is also recommended that the distance between the front edge of the post box and its edge of the road be between 6 and 8 inches (close enough for the postman to reach it comfortably and not so close that he hits the mirror of his van when trying to reach In addition to my 7121 steel post (with a longer wood post inside), I had a handyman install it for me. The post was installed with an 80-pound bag of Quikrete, and the mailbox was installed on the post quickly and easily once it was installed. The contractor charged $150 but I gave him a little more since it was difficult to break up and remove the concrete footing from the previous mailbox post.

The bags are red). In my case, I did these things He had a son cut back bushes and dig hole for me. Before setting the posts, I mounted the Mail Boss mail box on the post (I needed a As I had a helper, this made it easier to assemble the mailbox while it was lying on its side, and when I correctly positioned it in the cement rather than just leveling the post. After putting the mailbox/post into the hole, we measured it and made sure that the letters opening was between 41 and 45 inches above the street and that the front of the letters intake (when closed) was 6 to 8 inches in from the curb side of the road (per To raise the hole to a suitable height, we filled it with gravel several inches deep at the bottom. As there is a curb on the yard side, the ground is deeper, so the wooden 4x4 was not needed there In order to set the metal post, we directly poured cement into it. The bolts I used were about two or three inches long Being out of place - To give the cement a better grip, place it in the holes at the bottom of the post. About 8 inches of the post were going to be below the surface of Then, once we identified the height and exact location of the post, I drove three 4 foot pieces of rebar into the ground at the bottom of the hole (each piece went about 2 feet below the surface of the ground). In order to ensure that the post was accurate and level, we placed it OVER the rebar and supported it with metal brackets. Currently I have a helper to support the post, but we have already dumped three bags of materials There was not as much concrete mix as it sounds) in the hole, but the post stayed in place. Using the flat end of a 1x2 inch stake, I tamped down the concrete mix around the post to make sure it filled as many cracks as possible. A concrete mix that looked like face powder ended up being the real deal- Despite the gaps, it filled them in without too much trouble. In the center of the hole, the top of the dry concrete mix was about 2 inches below the edges. Taking our time, we carefully poured three gallons of water into the hole, patiently waiting for it to settle in. (A gallon should be used per each 50 pound bag, per instructions. 1) I used the flat end of the stake to tamp down the first few inches of concrete mix to ensure water would seep in properly. Adding an extra gallon of water made a big difference - A part of the hole is filled with rocks. I think that part of the water is taken by them. Our level on the mailbox top continued to be checked both directions for the entire duration of the project- We just checked to be sure it didn't move toward the end. The post seemed to be firm after about 30 minutes!.

Installed the Mail Boss Address Box 7107 and the post 7122 at my curb in early 2014 after purchasing in late 2013. Because it was too short for it to be stable (set in concrete), I used a pressure treated 4x4 inside the post. In terms of performance, the mailbox itself has fared pretty well, but one cannot say the same for the post, which has visible corrosion on several Even though I live in Palm Springs, CA, where it almost never rains and the climate is in the mid-90s, I'd not have been too surprised if this had taken place in a humid climate. It states in the product description that the post is made with heavy-duty materials This is duty number 10 Several other minor changes were made as well. This would be a steel of a gauge that is electrogalvanized, that should be at least somewhat resistant to rust. A few weeks ago I sent an email to the company's customer service department, but got no response so I was not very pleased.

The dry pack method of installing concrete is easy to use The method I used was The hole was dug a little deeper than recommended in the instructions and concrete was set in it. My next step was to fill the hole with the dry concrete mix about 1/2 way. Once I put the post in place, I tamp the dry powdered concrete mix onto the post. The post was straight in the hole, so I poured some water into the hole onto the concrete mix to help it mix. The post was then gently moved over the water to help it soak After that, I filled the hole with some more concrete mix, soaked it in water and then covered it There was still a bit of looseness in the post, but it was firmly upright now. As a final step, I attached the Mail Boss mailbox to the post (an easy process) and twisted it a little and positioned it till I was happy with the positioning. 15 minutes later, the mailbox was straight and angled just right, and is as sturdy as Product is fantastic, and I hope this will last for a long time You will help other people if you provide a concrete idea.

Related Products For Mail Boss 7121, Black In-Ground Mounting Post, 43 x 4 x 4 inches, for Use with Mailbox