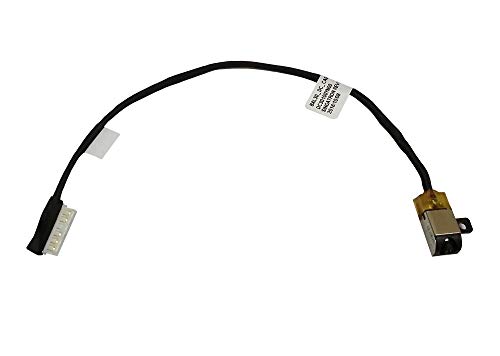
GinTai DC Jack Replacement for Dell Inspiron 15-5000 5551 5552 5555 5557 5558 5559 14-5458 5459 5455 5452 P51F P64G DC30100UD00 Vostro 3458 3558 3559 P65G 3559 17-5000 5755 Cable KD4T9
Score By Feature
OveReview Final Score
Product Description
Questions & Answers
Yes, it fits the A total of six models of that type have been completed by 5566
Thank you, the Dell Inspiron 5558 book fits it just fine. Please feel free to contact us if you have any further questions, and we will be glad to assist.
Sorry, I'm out of order. It's not the right
My 5555 is working now that I replaced it with this. As for whether it is the same as a 4, I do not know. Because I do not know the pinout, sizing, nor mounting points of a 4 jack, I chose to use a 5.
Selected User Reviews For GinTai DC Jack Replacement for Dell Inspiron 15-5000 5551 5552 5555 5557 5558 5559 14-5458 5459 5455 5452 P51F P64G DC30100UD00 Vostro 3458 3558 3559 P65G 3559 17-5000 5755 Cable KD4T9
I was able to replace this port for only $7 after Bestbuy wanted over $300 to replace it. If it needed a new motherboard, it would have cost over $300 at Best Buy. Please take note Videos created by people who perform excellent repairs) so you can see any parts or leaks that you should be aware of when replacing them. A headset jack was jammed into the power port by mistake, damaging the inside of the power port which had to be replaced with quite a few screws. The plastic connectors and cable connectors have to be handled with care or you could damage the laptop even more. Getting a professional to replace it for you if you do not feel comfortable with this step. The part is only $7, so it shouldn't be a very expensive replacement, maybe $100 or so, since it isn't the motherboard You could spend up to 125 dollars per hour on labor, depending on the person.

This DC jack appears to be much better constructed than the original equipment on my Dell Inspiron 5559. Thank you partspeople for making the installation so easy. Here is how to do it com/step- The replacement of the jack is demonstrated step by step. It might be helpful to pause every time you move from one step to the next until it is complete. The screws should be placed into an assigned paper cup so that (1) you don't lose any screws, and (2) you can understand when the entire step has been reinstalled that there are a certain number of screws to be placed before reinstalling it. Disassemble the laptop with care. Don't be intimidated by the process. Replacing the parts is as simple as following the steps written by the partspeople. It's simple to reverse the.

This Dell jack was perfect and I was very pleased with its quality and price. The Dell I use is an Inspiron 15-inch It wouldn't accept the plug that I inserted into the port for my charger. It was extremely disappointing for me to go through this with a laptop for which I paid almost $700 two years ago. As I use this laptop for work and for personal usage every day, it is not like I am "overusing" There was a Dell authorized laptop repair shop I called that wanted $125 to just come out (covid) and look at the laptop and that cost would be transferred to the repair "if" they found errors. How are you? You can't connect the plug to the port. Apparently this is a common issue with this model according to an online article. I just watched a YouTube video that told him how to install the jack replacement part, and now my computer is working perfectly! My boyfriend is really good with computers, so he just watched the video and now my computer is working perfectly! Once the application was installed, I couldn't really show pictures. While you cannot see the packaging, you can get an idea of its size from the images.
I would not hesitate to buy this product. A $5 bill. It cost me $30, a few minutes watching a video on YouTube and a little patience, but now I have a functional There is also the option of Dell repair. There is a possibility of a couple hundred dollars being lost.

I put it on my wife's Inspiron 15 5000 and it fit perfectly and works well so far There is a laptop model 5559. The last laptop she replaced was completely disassembled and I had to reassemble it all. I hope she does not break this one. To quote, the DC jack needed to be replaced because it was missing a plastic insert and failed to connect with the DC plug, leaving the battery uncharged. I've inserted the battery firmly now, and it immediately charged up to 100 percent.

For my Dell, it worked perfectly. For the first time, it was covered by the factory warranty, but this Dell is not worth paying somebody to correct the same issue It took me 2 1/2 hours to fix it better than the factory. I bought some tools, watched a few Youtube videos, and then we went home to fix it. Could it be that this is a little better than the one replaced by the Dell factory? Everything worked fine until the following week, when my wife dropped the laptop and the screen cracked. Definitely, I am going to fix that as well! Take your time, use the right tools, and you will be able to fix it too.

It is likely a glue issue or something else in the way caused it to barely fit. Finally, and this is the reason why I gave the laptop only one star, the data pin on the laptop was not connected to anything causing it In the end, I ordered the part directly from Dell for about the same price instead of running continuity tests. Don't waste your time.

The Dell Inspiron 3558 power adapter jack has a design flaw that is annoying. To secure it to the frame, it's screwed down with a thin plastic tab. It's in the tab that's flawed. There is a lot of flexing and breaking in this product. If this occurs, the AC adapter jack comes partially adrift inside the laptop, meaning you are only able to partially plug it in, leading to error messages and the laptop's battery not charging. In order to fix the problem, the part must be replaced. Replacing the part is relatively simple. Replace the old cable with the new one by unplugging it from the motherboard. There is an issue in that you have to disassemble the laptop almost completely. Following several videos, making copious notes, and taking meticulous care to label and sort the numerous screws, I managed to make the repair, and everything worked out perfectly! Thanks to my notes and watching selected videos, I was able to complete this task successfully, and it works perfectly!.

of my laptop when I took it apart so I could figure out what to do with it once it was put Online, you can find videos that will guide you through the installation process. Reassembling the unit is the toughest part since you have to keep all the screws organized to ensure you put the correct screws back in. It is necessary to remove a lot of screws during this installation, and they are of varying Make sure to organize the screws in the same order you disassemble the laptop. If you get the screws mixed up, you could end up with a smashed laptop. I am very happy with this replacement jack.

Related Products For GinTai DC Jack Replacement for Dell Inspiron 15-5000 5551 5552 5555 5557 5558 5559 14-5458 5459 5455 5452 P51F P64G DC30100UD00 Vostro 3458 3558 3559 P65G 3559 17-5000 5755 Cable KD4T9