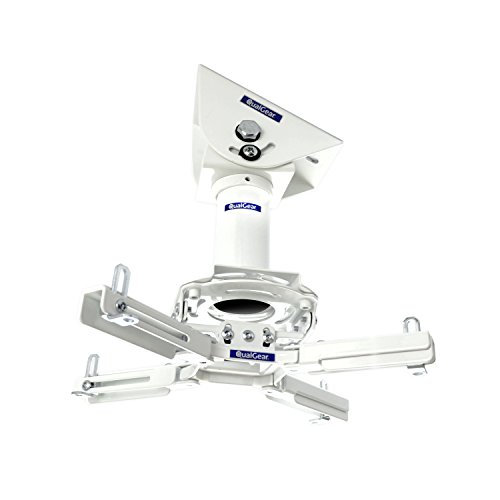
QualGear Qg-PM-002-Wht-S Projector Ceiling Mount Accessory , White
Score By Feature
OveReview Final Score
Product Description
Questions & Answers
Using my ceiling mount, I can extend 5 feet down. A foot and a half.
I believe you could, but you'd have to take into account the mount holes on the projector.
be done, but you may need an extension to keep the projector from touching the ceiling (depending on the pitch of the ceiling). In most cases, this mount will be used on a flat ceiling.
You can bet it will have lots of options and all the arms will Then, turn the projector upside down so that there are 3 places where the screws can be attached.
Selected User Reviews For QualGear Qg-PM-002-Wht-S Projector Ceiling Mount Accessory , White
Since the mount is designed for 4 holes, I was unsure that it would work since it has only 3 mounting In the end, I managed to remove one of the 4 arms and mount it to my projector without any trouble. There were times when I had to take the internal mounting arms out, turn 180 degrees, and reinsert them. This projector is designed with holes that are much closer together, which matches the mounting holes on the bracket. It is convenient that the mount on the ceiling has a hook on it so you can easily place your projector up there before tightening the You don't have to worry about your arms getting too A lot of the adjustments were easy to make, such as tilt, roll, and pitch. I saw a similar mount at Best Buy for $150 and thought it was a great product. The price of this one on Amazon is ten times what I paid.

In order to mount my Optoma HD26 projector lower, I used the low profile mount. What it does well is that it does what it should, and the quality of construction is excellent. The finish is powder coated and it's made of all metal. There are several hardware options for mounting your projector and it allows a great deal of adjustment. Having a bad day I'm sorry to tell you, but the instructions are awful. There is no denying that the bracket is universal and therefore the illustrations cannot be perfect for your device, but the bracket was not discussed and the illustrations were difficult to follow. This is why I mounted mine sideways as it suited me better than the way it was The second thing is that it is projector's holes were so close to one another that it can almost be fitted inside the round part without because the print was just a little bigger, I had to be very creative and position them in the most creative way. In the last kit, you can find concrete anchors as well as wall I'm willing to bet most people will be doing drywall, so why leave these out?.

It was a present from a friend that I have an older projector (Mitsubishi hc4900). I think this mount will fit all projectors if the user has mechanical aptitude. There are only three screw attachments that came with my projector, and they are not symmetrical. It was successful mounting the projector and mounting it on the ceiling. There are a number of extra parts that come with mount to assist with installation. For the unit you own, do not expect detailed instructions. There are simply too many to list. The projector doesn't seem to be "rock solid" up there, but once I tighten it up, it doesn't lose its projection angle when I press its buttons, moving the unit (I've ordered a remote control since to prevent In any case, it still points to where I set it, or at least it does when I push it around when I operate The price is good for the value, and the product is highly recommended!.

To mount my Epsom home theater projector on the ceiling, I installed this. There is no easy access to it because of where it is installed, but that is not the item's fault. In some cases, after turning on the projector, I have to slightly move it to keep the projection off the wall and on the screen. As I needed improved screws to attach to the ceiling, I had to get better ones. You don't have to worry about that. My only complaint is that there are many unnecessary parts included in this package. There is no doubt that manufacturers do this to cover a large range of projectors. My own personal rule is that I toss out 20% of an In terms of overall quality, it has held up quite well for the past two I don't really use the instructions much, but I thought this was good value for the price.

For the price, this device is hard to beat, has a very flexible configuration, is easy to set up, and appears to be well made. There are no plastic parts in critical places, and the metal is a decent thickness. A bit longer than you'd expect since I wanted to tweak the setup, but it worked great for hanging an Epson 2045 in my basement. There are two front and one middle mounting points on the Epson, so I removed two arms and poked the middle bolt through one of the spiral slots so that it creates a more result, I was able to adjust the projector further once I had it positioned correctly by leaving the adjuster screws a bit looser. Initially, I changed the articulation rig by removing one of the brackets (there is a top plate, a middle bracket, and a hanger bracket, each turned 90 degrees with a slotted screw hold that allows that I had to do a vertical keystone, so I added it back for an alignment that was nearly perfect without the By making use of three vertical pivot points, the camera can be adjusted left to right, up and down, and rotated here and there on the y-axis. It can be tricky to get this flexibility just right, but it's nice to have. The handle/arm/arms fits very well (except for the white, but they're not to blame for my mistake) came with a variety of screws, spacers, etc for mounting everything I could possibly need (when I removed the arms i put the washers back in). The one downside of removing the middle bracket is that you lose left/right adjustment, so you may have to add an H-bracket The keystone is the same, but you get two inches closer to the It was a bit difficult to line up the second set of holes with the ones on the projector mount, but I spread that bracket and squeezed the ceiling bracket just a touch and then after taking the projector up, I lifted it a bit until the lower screw holes lined up. Initially, there were some nylon spacers on the bracket that had to be removed. As long as you perform a slight lift of the projector, you run the risk of the projector mount sliding off the ceiling mount screws until the lower screw is inserted.

Related Products For QualGear Qg-PM-002-Wht-S Projector Ceiling Mount Accessory , White