

Dorman 911-753 Throttle Position Sensor for Select Acura / Honda Models, Black
Score By Feature
OveReview Final Score
Product Description
Questions & Answers
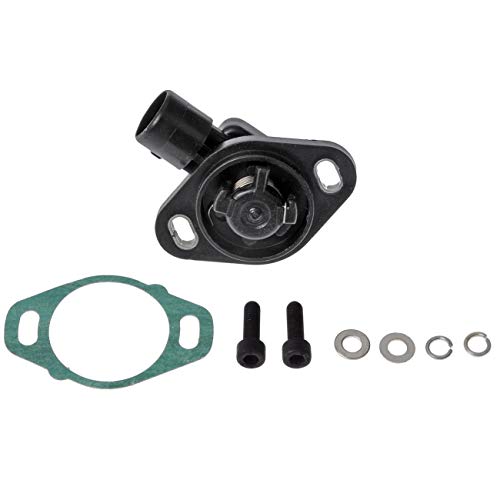
Yes, it is. A new green gasket is included.
TPS sensor screws are breakaway screws that allow the sensor to be detached from the throttle body. As soon as the screws are torqued at the factory, their heads are removed. The following three replacement options are available Options 1 and 2 Tapping the screws out with a small screwdriver and hammer can be done. It is a screw, not a rivet, so it can be removed easily. There are two options to choose from The three option 3 is to use an "EZ" out drill bit to remove the old screws. You can create a slot on the top of the screw with a screwdriver, then remove it with that tool (use a "Dremel" rotary tool to create the slot). Attach the sensor with (2) M5 x 8 bolts, The voltage test is performed as follows If the sensor is not connected and the ignition is not turned on, follow these steps You can check the voltage at signals 2 and 3 by reading the DB pins A probe is used to pierce the wires in step 3. Refer to the illustration below to identify the pin You can check if your reading matches the specifications below, after which you are finished. You can skip this step.
4. The Throttle Body should be left closed to operate on 5volts. The Throttle Body must be open to five volts with the throttle fully open. *br> If the voltage is incorrect, loosen the bolts enough to rotate the TPS sensor and adjust it until the proper voltage is obtained. You must tighten the bolts once you have calibrated the sensor.
The vehicle does not have one offered by Dorman.
The answer is yes.
Selected User Reviews For Dorman 911-753 Throttle Position Sensor for Select Acura / Honda Models, Black
It is hard to understand the instructions included in the package I will take a picture of the sensor plug itself and tell you to backprobe pins 2 and 3, the yellow and red wires in the plug. You'll receive readings that make little sense if you do this. I'm glad YouTube is there to help me out In this case, you need to backprobe only the red wire and connect the ground of the multimeter to the negative terminal of the battery. THEN you can adjust your multimeter. A 5V output with the transistor closed and a 4V output is desired. I had the TPS code not return on my initial short test drive and the part works as expected. Poor instructions result in a 1 star deduction. In addition, the OEM screws can easily be slit using a Dremel or die grinder for use with a straight blade screwdriver, as mentioned previously. To change the screw at the bottom This was done on a '98 Honda CRV To see where to slot, I had to use an inspection mirror. Any small handheld mirror will do if you do not have an inspection mirror, or you do not relish the idea of buying a new tool as much as I do.

We installed this on a 2003 Honda Odyssey EX that had 170K miles and lacked throttle response and transmission shifting. There were many of us who were early-birds As a long-time Odyssey owner responsible for millions of Honda vehicles, I am especially attentive to our van's shift quality as it ages because Odyssey owners are so conscientious about Honda's transmission issues. I suspected the TPS was in need of replacement because I noticed my van sometimes started slowly instead of right away as usual. Other owners at Odyclub suggested it might need to be replaced. Please visit www. com. It was very important to me that I chose the Dorman TPS because it is a reputable U. S. company. A company that specializes in aftermarket parts for automobiles It is the same tool most mechanics use at car dealerships & You can find independent retailers. It has already been mentioned that the installation is as mentioned by others. Using Dremel's cut off wheel, I cut off the section that I needed.

On the 1992 Honda Civic of my daughter, the original OEM repel works perfectly. Unless the factory sensor is removed, it is not possible. There is no head to the screws holding the factory sensor, so for removal you will need to cut slots in them using a dremel type tool and to use a flat head screwdriver. Taking the screws out is not hard and once you do it, they are fairly easy to remove. It will be necessary to backprobe the wires after the new sensor has been installed and be set to the correct calibration.

When I cruised at highway speeds in my 93 Civic with 180k miles on the odometer, it would start jerking. Since the TPS had already been replaced once since owning the car, I didn't think it would be the TPS. It is most likely time to replace the TPS sensor if you are experiencing a slight jerking in low gear (as if the car is having trouble finding the right gear) or a jumpy tachometer when driving on the freeway. The fact that this was the case for me and was a cheap and easy fix rather than a transmission problem makes me happy.

The product did what it was meant to do. After replacing this part, a problem continued to occur with my TPS. I ordered this part after having a problem with the TPS on my car. On further inspection, it was found that the signal wire for the TPS had been damaged The same TPS sensor is used by Honda and most other manufacturers of the 1990s During the 2000s, cars were more advanced. The plug from the 2003 Honda Pilot served as a replacement. Having used this sensor in conjunction with my 95 Integra GSR, B18C1 sensor has been smooth.

I have a 2000 Civic, and I need a new one. As you are aware, as far as I am aware, factory sensors do not usually need to be replaced, except when the throttle body housing its attachment has to be replaced. Thus, when you try to remove it with a screwdriver, you may find that it is not a simple screw to remove. In reading about how to remove these screws, I found three options Extractor bits or a slotted screwdriver "punching" a slot or cutting a slot with a hacksaw are some examples of slotting devices. It may be worth trying the hack saw method first, as I was unable to use the other two methods. It is important to saw a slot deep enough to allow a screwdriver to be inserted This is the point where you want to be careful, don't mess it Screws like this are not very tight, which makes them relatively easy to remove and replace. Following that, you'll be getting pretty close to the correct setting using a voltmeter - just follow the instructions that came with the sensor.

Related Products For Dorman 911-753 Throttle Position Sensor for Select Acura / Honda Models, Black


