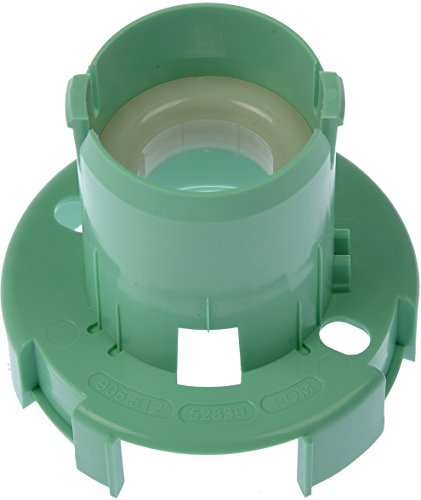


Dorman 905-512 Steering Shaft Bearing for Select Models
Score By Feature
OveReview Final Score
Product Description
Questions & Answers
It is the bearing that is most likely to solve the rattling issue. Simply to be on the safe side, I bought both. You'll get a better steer feeling when you replace the shaft with the bearing, but you'll also get rid of the rattling or clanking.
We apologize, Dorman does not offer a brake kit
It will, I'm sure of it. I was able to install it on my 2006 2500HD I was able to cure the mystery rattle as well. Voici a tip Put some silicone adhesive on it to make it fit even better. This will stop it from rattling while in use.
You are right, it will fit.
Selected User Reviews For Dorman 905-512 Steering Shaft Bearing for Select Models
This took care of all my rattling issues on my 2005 Silverado 2500HD. When you replace the bearing with this one, it is like brand new again. The front of the truck had always felt like it was falling apart, but now it is like new. Then I put my seat belt through the steering wheel and buckled it to hold the steering wheel in place as I turned the wheel to the left until the onstar button pointed to the floorboard. It is a good idea to keep your steering wheel disconnected while it is still turning. On the next step, I removed the 15mm bolt from the intermediate steering shaft under the hood, then removed the 15mm bolt from the steering shaft under the dashboard. In working on the steering column, the shaft was resting against the firewall. close enough to the airport and not too far from the airport. By using a flat head screwdriver, I forced the old bearing out. I was able to remove it with no problem. As I greased the new bearing and the steering shaft coming out of the steering wheel, it was a simple process. When the new bearing was in place, I pushed, pulled, twisted, and cussed while I was wiggling the steering wheel. (DO NOT TURN THE STEERING WHEEL, JUST WIGGER IT BACK AND FORTH). Although the steering wheel bearing will move with the shaft while it is being wiggled, it made it so much easier to install once I started wiggling. This is a very tight space, and it takes a lot of force for the bearing to be safely installed. It should snap into place as soon as you keep pushing and wiggling it. As I heard mine snap in, I thought I heard a small crack. The plastic will crack or break if you pry it in with a screwdriver. The only tools I had gave me difficulty. I am sure that there are tools that would make this easier. It only took a few minutes to snap it back in, clean the grease off the shaft, and put the steering shaft back under the dash and under the hood, along with the bolts that held it in place. A total of 20 minutes were needed from start to finish to change the bearing. The rattling sound has disappeared after I tested it out. Rather than replacing your intermediate steering shaft first, you might want to try this part if you are experiencing a rattling sound. There is a high probability that the rattling is caused by an Another method would be to grab the steering shaft and shake it in an attempt to identify the rattle. If you can move the shaft and hear a rattling, the most likely culprit is Here's something important to keep in mind! It is only possible to insert the tab into the bearing one way, given there is a small cut out on the right side of the steering column for the tab to fit into. Due to the way the OLD bearing fits into the steering column, the NEW bearing will fit into the floorboard. I've attached some pictures to this email. The old bearing was in place before I started, but I hadn't taken a picture.

The installation of this part is about 6 months old This time last year. It was immediately clear to me that the rattling that was driving me crazy had stopped after I slapped it in. After two months of driving with a smile on my face, I felt the rattle return. Due to my desire to not have to work on it again, I searched on some Chevy forums and found a familiar trend of people experiencing the same issue who had replaced the same part. In this phase, I began researching ways to solve the problem without removing or repurchasing the software. A hose clamp with a hole large enough to surround the apparatus was suggested by Forum. This is exactly what I did, I installed it, and I tightened it. This time there was no After learning what I know now, I would go straight to the hose clamp and try that first. I've been using this particular repair for months now and my truck is absolutely silent over rough roads.

0L Duramax Chevrolet Silverado 2500HD from 2005. ** - There was no clunking in the steering wheel or column at low speeds as a result of this change. For this piece to be installed, make sure you have a 15mm socket, grease, and a thousand inappropriate words at your disposal. dead simple, but it takes patience and nothing short of brute force to push the new bearing onto the steering column. Be sure to lubricate both the inside and outside of the bearing as well as the steering column shaft before attempting to install the new part. After you read this, you'll thank me. Note that the slide is particular in how it flies into position. As you can see from the photo attached, the new piece is correctly installed, and that is what it should look like when you're finished.

Then, add this How does your steering look and sounds? Are there any wonderful GM popping sounds coming from it? It is not the solution for the sound, but it will definitely make your steering more nimble. When you have not replaced this part in your car and it has reached 200k, then chances are very good that you will need to do so. On the picture of the product, you can see that the bearing is enclosed in a plastic ring that slowly wears off over time. It would have been perfect if the bearings had been lubricated during installation but the hubs came out of the steering housing and got Here is a link to my video review for more details.
