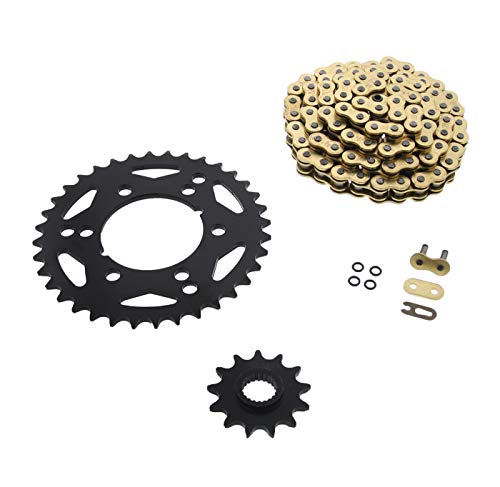
Liftmaster 41c4220a Gear and Sprocket Kit for Chamberlain, Sears, Craftsman and LiftMaster 1/3 and 1/2 HP Chain Drive Models (Verified 100% authentic OEM lift master)
Score By Feature
OveReview Final Score
Product Description
Questions & Answers
Upon contacting chamberlin company, they told me that as long as it was a chain driven model, it would It would be a good idea to look at their website and call just to be
Several models can be repaired with this kit. With each kit, you will find instructions. The liftmaster website has them available for download, as well as a link that lets you check if the kit fits your model.
It is truly unknown to me. Nearly all of those manufacturers seem to use the same tried and true plastic gears and just paint the units differently, with a different label. In general, if it is compatible with LIFT MASTER stuff, then it is probably ok. I take the following position The replacement gears can be purchased from Amazon , if they do not fit when you see the unit next to your broken one, you can send it back and get credit on your card. Some time is lost but there is no money lost. In most cases, you'll have to eat the parts if you order it, since it won't fit. Taking a meal out at a restaurant costs more than what is provided in this kit. I wish you the best of
certain this is the right model for your garage door does not display the number on their web site, and a google search does not turn up an m375 at all, and there are a lot of cross reference sites. A parts list would be useful. Do you have a manual?
Selected User Reviews For Liftmaster 41c4220a Gear and Sprocket Kit for Chamberlain, Sears, Craftsman and LiftMaster 1/3 and 1/2 HP Chain Drive Models (Verified 100% authentic OEM lift master)
I was even In fact, I wasn't certain why I bothered to write a review since there are already hundreds of them on this website. Prior to purchasing the item, I thought I read most of them to make sure I was doing things correctly. I ran into a few issues after reading so many reviews and doing research that didn't get covered in a few reviews that I read, despite the fact that these issues appeared in some other reviews that I didn't get to see. You know, only a fool can spend 1700 minutes reading In my review, I listed all of the issues I had as a way to combine and help others get this job done and proactively look for potential difficulties. I noticed some reviews indicated that they did not need to perform every recommended step. There were some issues I encountered when I tried skipping a few steps that other users did not appear to encounter. The most critical reviews I've read have also not struck me as so bad. While I can understand some folks have complaints, to me they did not seem that important. In my upcoming blog post about how I had to redo my garage door opener, I will include all of those things. Because in the overall scheme of how badly things could have gone and did in my case, those things were a piece of cake to fix, I did not feel like the stars should be removed from the review. My garage door spring broke, causing this whole thing to happen. Suddenly, I realized that the opener was straining a bit, and after a few moments found out I feel like I'm just a wanna-be I figured it would be a good idea to replace the springs because I am a DIYer. In the end, it's inevitable This would have cost more than I was willing to pay for a professional to do it. By replacing the springs myself, I was able to keep the door opening and closing at the perfect level and adjust them accordingly for cheap. What do you think? Not at all. One of my old men came over and he was one of those old cranky guys who would keep hitting something or pushing it to make it work until it worked. As a result, he kept trying to open the garage door with only one spring, and I was left with a ripped gear in addition to having to replace the springs. I was shocked to discover that the opener wore thin after 19 years, almost original to the house. There aren't a lot of products like that anymore, which meant I was surprised to find it still working. We needed to get some spare parts from Amazon since replacing the entire opener would have cost at least several hundred bucks. Time to do some research and order some spare parts from me only a few days to get the part. I see comments in the review regarding some unreliable vendors and parts that weren't working, but they all seem to be referring to In this case, I am specifically referring to the Liftmaster 41c4220a replacement gear kit. It's not clear where all of the reviews about door remotes and other things came from, but it's all right. In fact, I had been under the impression that reading the reviews would take me 30 minutes at most. I was mistaken. I spent more than one hour on it. Although I went back over everything four times, I still took my sweet old time. Ensure you have a few small tools, such as pliers, screwdrivers, and wrenches on hand. It takes patience and a lot of effort. Screws that are small will slip out of your grasp and end up To the extent that it relates to the actual installation, I could write a thesis on it, but the best bet would be to do a search on YouTube for "garage door opener gear replacement" and watch two It wouldn't be fair to link to them here because I don't know if the owners will have any trouble. Some are shorter and some are about 30 minutes. A few skip a few of the parts that need to be replaced, while others go into detail. It is way easier to understand and see from the video than I would be able to do so If you follow the instructions, you can do it in a matter of minutes by removing the cover and the gear, then reinstalling You can now reassemble the cover after greasing it up and reassembling it. In the best case scenario, there is no need to remove the motor. If the other parts appear to be in good condition, then you do not need to replace them, but since it was a pretty old motor, I decided to. In the case of this and replacing the bearing rings as well, you will probably find that some feel the motor needs to be removed for that too, while others think it needs to be removed. My bearing was messed up and impossible to remove with the motor still attached, so I tried to get away without removing it. By the time I tried to remove it, I would have broken something or hit myself with a hammer. This is what happened to me when the motor had to be removed. Replacing all the gears and bearings, lubricating it all and putting it back together again took no time at all. In that case, I were ready to proceed, so I got in the unit, tightened up the chain again, and tested the operation to ensure it halted with the proper clearance. I then latched the door back on and began the process again.
I was able to get it to work again after I was The videos are a god send, as I spoke about earlier. What you should bear in mind are the following points. Check that the part fits your opener before buying. On the opener website, you can see the part number for the gear and find the comparative part number for the kit and buy it. View the model number on the opener, then go to the opener website and see the part number. All the tools you need are included in the kit. Apparently some people unhooked the door from the chain with the door lowered, while others unhooked it with the door raised. As far as I am concerned, I did mine while the door was closed and had no issues. You need a small wrench, and a socket extender for your wrench is an absolute necessity if you aren't going to remove the motor and just replace the main gear. Taking a picture of anything you unscrew or unplug should be the first step in determining what needs to be removed. All of the parts can be replaced in one simple operation. The tutorial videos are especially important if you don't watch them. It is possible to either disconnect the electrical wiring or remove the connectors from the boards if you decide to remove the motor. No matter which way I look at it, there seem to be about the same number of wires. Being so old, I was afraid the plastic connectors would be brittle. I removed the wires instead of removing connectors because I was worried about them. In all my research, I found that both ways were been done, and I could not identify an advantage for either of them. Taking pictures will help you to remember where everything goes if you feel that you might forget. The motor should move smoothly with no issues after replacing the rings, gears, and grease and will be snug to the hand when you rotate it by hand. There is something loose before the final gear is put back in, so make sure you tighten it properly before you reinstall it. I have only seen one main complaint, which is that there are no threads on the main gear holes. It appears that some are rating this kit less than five stars because of one of the items. It was of no concern to me that unthreaded holes remained after everything else went wrong with my installation. The screws simply had to be threaded into the holes before I attached the gear unit, so I even threaded them before I attached the main gear unit. This will not be shown until the very end of the videos, but please watch to the end so you won't be surprised. When you go the quick route and just replace the main gear, these reviews and videos will be a waste of time. Just put it in and take it out, and you will be done in no time. If you see the other parts are worn and wish to replace them, it may You will be able to determine what you want. After I have more knowledge of the process, I will be sure to do it again. When you are handy you will not have to spend a lot of time on it and if you have never done it before (like me), make sure that you take things slow and prepare ahead of time. By the time I tallied up the money I saved doing this entire project and buying new springs instead of paying someone else or buying a new opener, it was obvious that it was the best option. You will have a great time! In the photographs, you can see the broken spring that started the whole thing off. Throughout the article, I have also included photographs of the destroyed gear inside the box, as well as the replacement. A photo of what you need to remove for a quick gear replacement and a picture of my unfortunate 'remove everything' to get it working adventure is included as well. That's a step you probably won't have to take.

The one I just installed in my Craftsman garage door opener is just like this. There is nothing special about it it is just as Chamberlain/Lift-related Masters of the art of opening. The whole project took me about 45 minutes, including gathering the necessary materials. I had done it before in my other door opener. A tool. I have found that the three screw holes are not threaded in the round metal mounting bracket for the whole sprocket assembly, as others have noted. If you want to eliminate some hassle, put the screws through it before you put it in, and then remove them after you've completed installation. It will make the actual sprocket installation easier if you do this first. My goal is to prevent abrasions by removing the outside cover without removing the motor or anything else inside. The three mounting screws to be removed from the sprocket bracket can be removed with a 5/16" nut driver for the two that are easily accessible, and with a 1/4" drive ratchet and 5/16" socket for the hard-to-reach one. My trolley is all the way out in the closed position with the door locked and all that I am doing with the door closed is all done with the door closed. In advance, I would like you to By removing the gear from the bottom of the shaft (with its little plastic clip) on the sprocket, then turning the gear on the limit switch, in the door down position, the contact on the end becomes all the way to the right (from the backside of the unit). My next move was to rephrase my initial message As you install the gear, please make sure the contact on the switch is still in the down position, and secure In this way, the door limits are as close as is possible to actual lengths. The door can be closed all the way with an adjustment of about 1/8 of a turn of the limit screw. Having recently ordered another kit, I have one on hand to keep on hand just in case one day the sprocket gear in one of my openers stops working.

Having found this kit is a great blessing to me. For the rebuild, I decided to remove the opener from the garage and bring it inside the house. As a result, I was able to access all areas of the opener with greater flexibility, and the environment was more comfortable and controlled. In addition to replacing the worm gear, I also replaced the gear cables. This new one seems to sit properly to the new drive gear after 28 years of use. The old one seems to have worn out after 28 years of service. The worm gear removal seemed daunting, and I almost changed my mind after I studied it for a couple minutes, but I kept going and in the end the drift pin was easy to remove after I used a punch tool with the appropriate size. Having said that, let me offer one suggestion and a When I assembled the parts, even though I had placed them in order as I disassembled them, it was difficult to identify which side of the frame/housing some of the bearing parts belonged to. Taking a picture of the bearing assembly before taking it apart is a good idea, or at least studying it until you know where the bearings go in the metal frame that holds the axle and the Briefly, all the bearings and sensor elements are on the outside, while the worm gear is on the inside A. Photographs). After the parts explosion, I was able to put the project together, but it was a bit of a It was fortunate that I had a hard copy of one of the original owners manuals, which had a parts explosion in it. If you need it, you might still be able to find it online.

Related Products For Liftmaster 41c4220a Gear and Sprocket Kit for Chamberlain, Sears, Craftsman and LiftMaster 1/3 and 1/2 HP Chain Drive Models (Verified 100% authentic OEM lift master)